Dublin Arts Project - Virtual Tour
The Dublin Public Art virtual tour features a number of customized interactive elements that allow for users to have a unique experience visiting all of the public art displays located throughout Dublin Ohio. To better show off these elements, I have decided to make a tutorial that details how I built these elements and how I made them all work together.

The different features I wanted this project to have included:
A map for navigating the different art installations
A list feature as a different means of navigating
Audio hotspots that play the audio recordings of each installation
Information boxes that have key info like the artist and location
I will go through the processes I used to create each of these features utilizing the different skills and techniques I have learned from previous projects.
Audio Hotspots:
Some of the art installations on the mobile tour have multiple audio tracks. I decided that I was only going to have 1 audio track per installment to make things more uniform across the tour. First thing to do, was to download all of the audio recordings. To do this, I utilized a technique using the web developer tools to locate media on the Dublin arts website. After downloading, I was ready to start designing the media bar, as well as the hotspot.


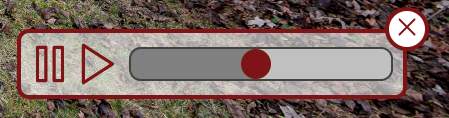
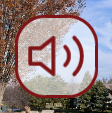
The design I went with for the audio bar is smaller than the UI so when it opens it can stack neatly on top. The bar also has a pause and play button next to it that slightly grows when the mouse is over it, and a close button in the upper right corner that stop the audio playing and hide the audio bar. The hotspot I made large enough that you can easily find it, and tried to place it as strategically as possible in its environment so that you are still able to view the artwork uninterrupted.
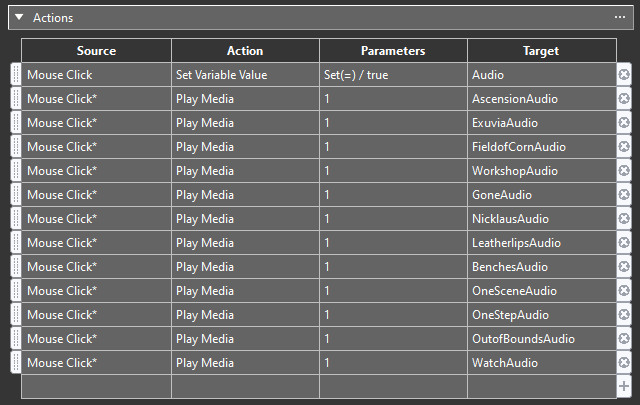
Logic blocks and action filters were used so that the correct audio is played, and also so that the correct audio bar is displayed.

At this point, the audio hotspots have been completed, and I was ready to move onto the next task.
Map:
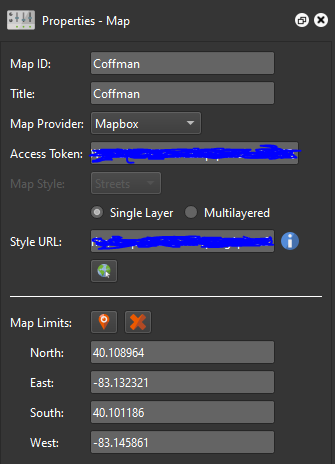
To build the map function, I had to first start with the actual map. I accomplished this by utilizing a map provider called Mapbox, which is a service that allows you to create custom map styles. Pano2vr was able to use this map by using an access token and a style URL to access my custom map.

Because there is a high density of tour stops in Coffman Park and the Dublin Arts Council, I ended up using three maps so that markers would not overlap one another. I created interactive buttons that sit at the bottom of the map element to navigate between the three maps.
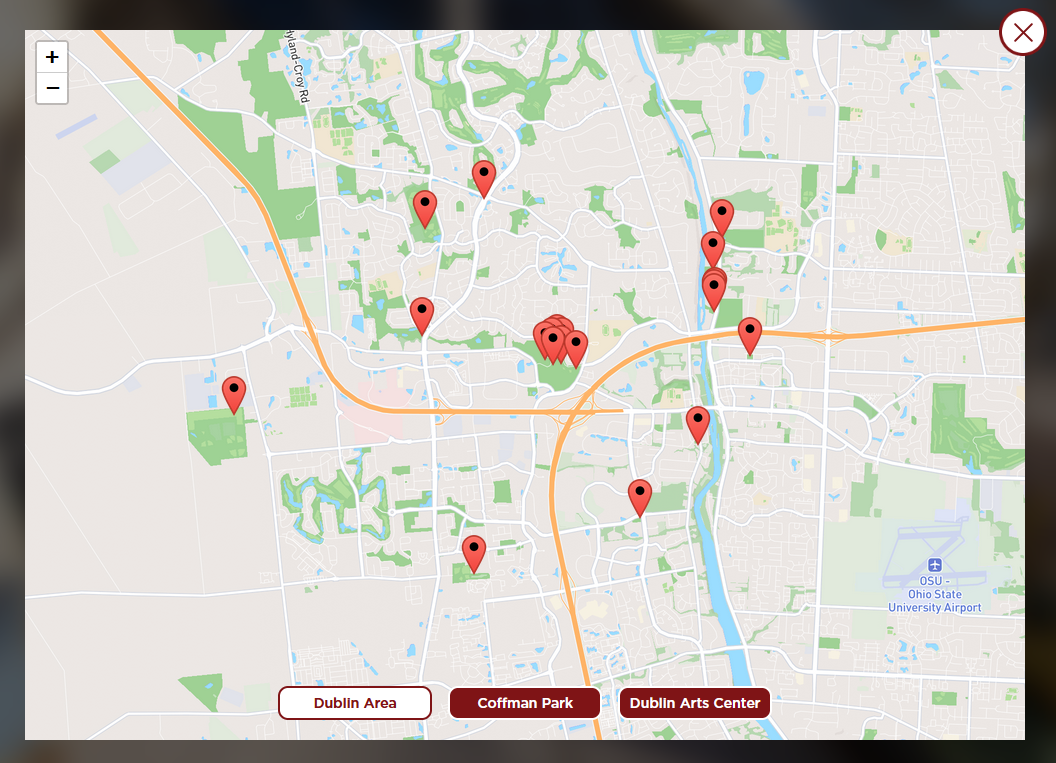
Now that the map was set, it was time to start designing the map marker. I went with a design that starts as a circle, and expands outward to reveal the name of the stop. It’s easy to see on the map, and does not take up too much space. I added a logic block to the marker that tells it when at a stop, its corresponding marker on the map turns green. It took some time, but I am very happy with the results.


With this done, I now had to set a logic block that makes it so that only the correct markers are shown on each map. I accomplished this by using tags on the nodes, and using a visibility logic block on the map marker that checks if the node has a corresponding tag that matches the name of the map.

Navigation List:
For the navigation list, I had a pretty solid idea as to what I wanted it to look like. I want it to be a pullout menu that opens from the side of the screen, with a scroll area for all of the stops. Trying to expand my skill set, I used a cloner which I have never used before. I used it to quickly make my list of tour stops, nested in a scrollable area. The result was exactly what I wanted, another interactive navigation element to this larger tour.

Skin Structure
Skin View
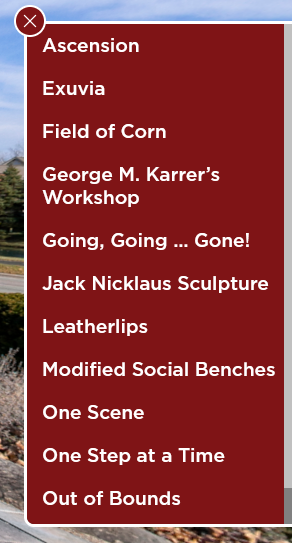
Result
As I continue to add the rest of the Dublin public art projects, the list will become longer and there will be more area to scroll. Along with the list I also made a list button that sits on the bottom right corner of the screen.
The navigation list is now complete and I am able to move onto my next asset.
Information Panel:
The information I wanted to display at each stop includes the artist, the date commissioned, its location, and the address. I started by creating a document that had all of this information that I could reference easily, rather than having to have multiple tabs open. I’m a firm believer in organization and planning, laying everything out beforehand to make a project easier to complete. After creating this list, it was time to start designing the look of the information panel.

I went with a design that is to sit in the bottom left corner of the tour. Its big enough to catch your eye, but not too big to be overbearing. There are 4 rows and when the mouse is over them, the words on the right side move slightly inward to create a more interactive experience. I made the first and final row clickable elements that open to the artist’s website and to a google map location of the address listed. I also added a small arrow to the top that when clicked hides the panel if the viewer doesn’t want to see it.

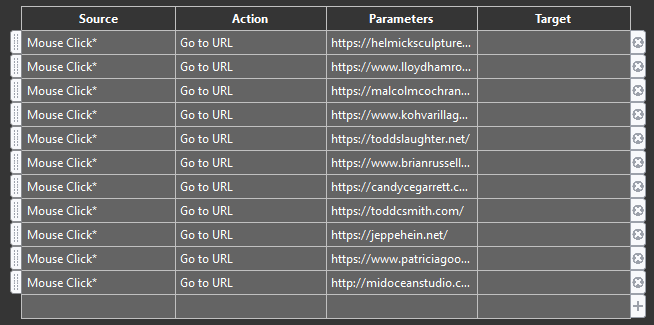
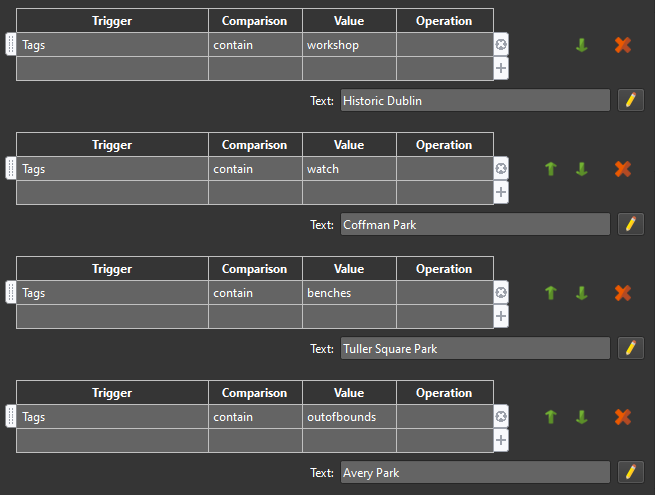
The final step for the panel was to use logic blocks for the text so that the correct information is displayed for the each artwork. I used tags as a trigger rather than titles because some stops have more than 1 photo, so this way the array of photos will have the correct info.
All of the components I have been working on are now complete, and it is time to put them all together with my original UI to make this project seamless.
Completed Product:
After completing the assets, I needed to integrate them in the tour, making sure they all work together and will work on any device. Things like setting the map to change sizes based off of the users screen size, or adding words that pop up when the mouse is over certain icons. It is the final 10% that makes the difference between a good, and a great user experience. Some of these adjustments I had to make include:
Making it so that you cannot open the map and the navigation list at the same time
Stopping audio from playing when you go to a different panoramic
Hiding other elements when the map is open
Making it so that when the “hide” button is pressed that the rest of the user interface disappears
Small adjustments like these can be tedious but are necessary to create the best experience possible. As stated before, I am not yet done with shooting all of Dublin’s public art pieces, but as I complete them I will continue to add them to this larger tour.
Although the project is complete, I still need to format for mobile devices. I did this by using the “integrated web server” in Pano2vr with my phone to get a live view of what the tour looks like on mobile. After making adjustments in Pano2vr, and adding my logo and splash page, the tour is now complete.
Overall I am very happy with how this project turned out, and I will continue to make adjustments, and add the rest of the stops as I continue to shoot them. I learned new techniques as well as strengthened what I already know. I hope to make more large scale tours like this in the future, and I will continue to push myself to create new and exciting features.
Thank you for checking out my project.